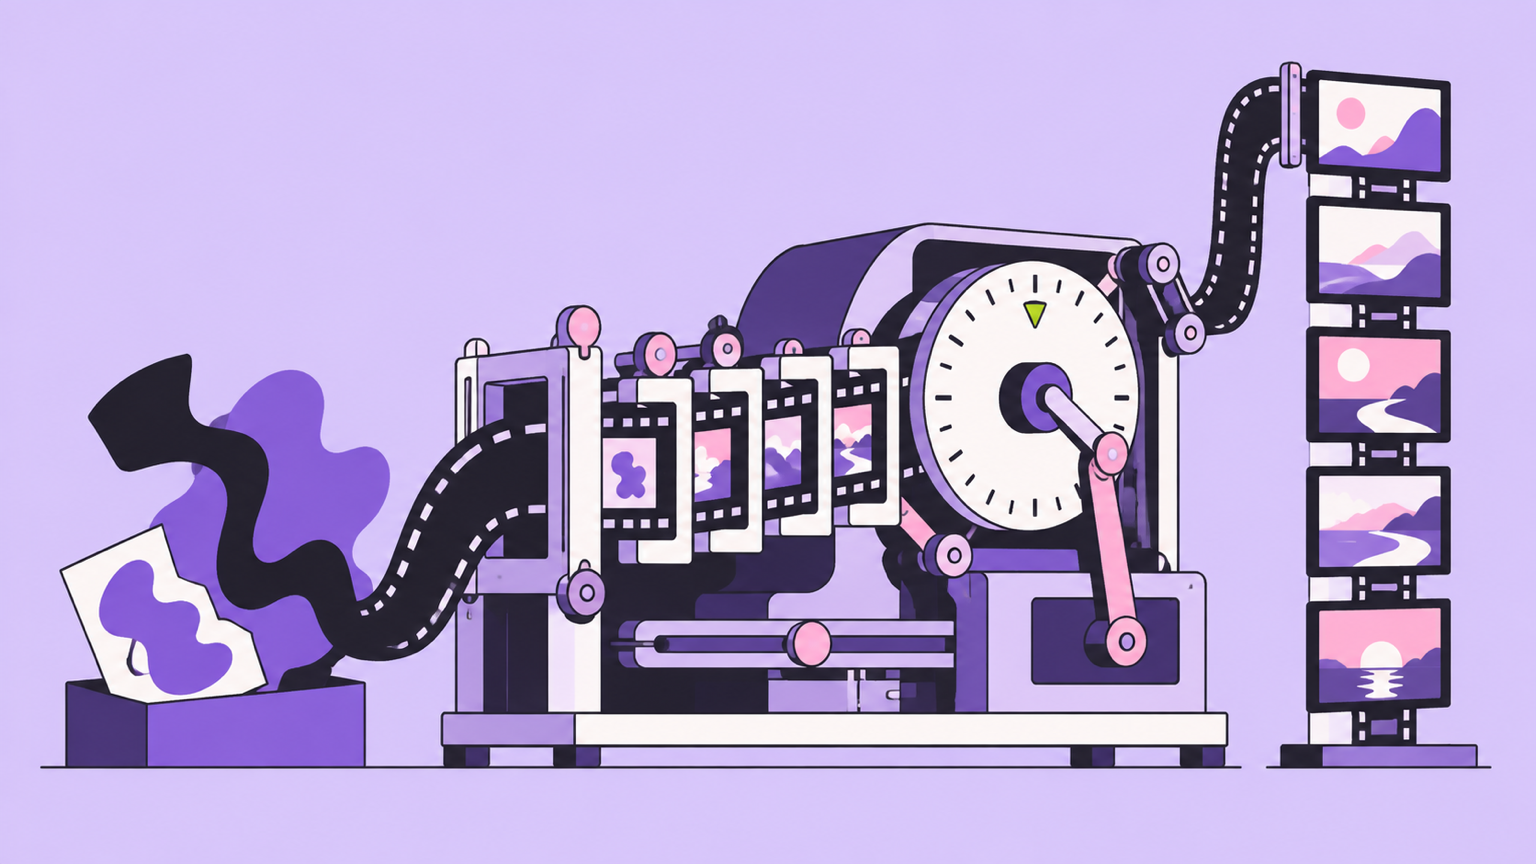
Claude Opus 5.5 does not generate video frames. It writes a program, usually HTML, CSS and JavaScript or a React component, in which every pixel is a function of time. A headless browser then captures each frame and ffmpeg encodes the MP4. That is why its motion graphics look sharper than diffusion video: the type is real type, the shapes are real vectors, and every frame renders the same way twice.
It is also why most first attempts look the same. Ask for “a cool animated intro” and the model fills every open decision with its defaults: a shifting purple-to-cyan gradient, a frosted glass card, glowing particles, words bouncing in together, and a tagline like “AI-powered. Next-gen. Seamless.” The engine is not the problem. The brief is.
This guide walks through the workflow step by step, using one real 10-second, 1080×1080 piece built for this article. Every still and clip below comes from that project, rendered with Remotion, so you can see what each step changes.
| Step | What you decide | Slop it prevents |
|---|---|---|
| Choose a render engine | Remotion, HyperFrames or a single HTML file | Nondeterministic, unrepeatable renders |
| Install skills and taste rules | Framework best practices plus your own bans | Default gradients, glass and glow |
| Write a brief with exclusions | Audience, message, format, what must not appear | A flashy reel with nothing to say |
| Lock design tokens | Palette, type, spacing, safe areas | Colors and sizes drifting between scenes |
| Plan beats in frames | Purpose and frame range for every beat | Random pacing and everything moving at once |
| Build in four passes | Layout, type, motion, then color | Motion hiding weak composition |
| Render and inspect frames | Boundary stills before the full render | One-frame flashes and clipped text |
| Direct revisions by frame | Notes tied to exact frame ranges | Vague “make it pop” loops |
1.What AI Slop Looks Like in Motion
Slop is not a style. It is what appears when nobody made a decision. The clip on the left was produced by asking for “an exciting animated intro for an innovative AI product” with no other constraints. The clip on the right is the finished piece from this guide.
The tells are consistent across almost every unconstrained generation:
- Rainbow or purple-cyan gradients that shift hue constantly, so the background competes with the content.
- Glassmorphism: translucent cards with blur, glow borders and inner shadows.
- Decorative particles drifting upward with no connection to the message.
- Everything animating at once, usually fade plus scale on a linear curve, with nothing establishing hierarchy.
- Generic copy: “Unleash”, “the future of”, “seamless”, “next-gen”.
- Constant motion: bouncing, orbiting or 3D tilting that never settles.
- No hold at the end, so the viewer never gets to read the resolved frame.
The fix for each one is a decision made before code exists. The rest of this guide is about making those decisions in the right order.
2.Choose a Render Engine
Opus 5.5 will pick the simplest route unless told otherwise. Independent tests found it defaults to a single HTML file with a seek() function, captured by Playwright and encoded by ffmpeg, even when a framework like Remotion is installed. Name the engine in the prompt.
| Engine | How it works | Best for |
|---|---|---|
| Remotion | React components; every value derived from useCurrentFrame() |
Reusable systems, data-driven video, long projects |
| HyperFrames | HTML, CSS and GSAP compositions rendered by headless Chrome and FFmpeg | Web designers, GSAP users, Claude Design handoff |
| Single HTML + seek(t) | One file exposing window.seek(t); Playwright captures, ffmpeg encodes |
One-off launch clips, quick social pieces |
Whichever you choose, the same contract applies: every visible state must be a pure function of time. No Date.now(), no requestAnimationFrame loops, no CSS transitions, no timers and no unseeded Math.random(). Browser animations that run on wall-clock time render differently on every capture. Frame-derived animations render the same result every time, which is what makes precise revision possible.
The demo in this guide uses Remotion. Create a project and install its agent skills:
Install
npx create-video@latest
npx skills add remotion-dev/skills
For the HTML route, HyperFrames is HeyGen’s open-source renderer: the agent writes HTML plus seekable GSAP timelines, previews in a browser and renders a deterministic MP4. It ships as a Claude Code plugin and a Claude connector.
3.Install Skills and Taste Rules
Framework skills teach Claude how to use the tool correctly. Remotion’s official set covers project creation, markup, captions, rendering and a /remotion-best-practices fallback. HyperFrames ships skills for its full loop: plan, write HTML, wire seekable animations, lint, preview and render.
Those skills make the code correct. They do not give the output taste. Add a short rules file of your own, either as a project CLAUDE.md section or as a custom skill, that loads before any code is written. Write it as bans and defaults, not adjectives:
## Motion rules (apply to every composition)

Never:
- gradients that shift hue, glassmorphism, glow, bloom, lens flares
- decorative particles, orbiting shapes, 3D card tilt
- linear easing on anything a viewer tracks
- more than one dominant action on screen at a time
- placeholder or marketing copy ("unleash", "seamless", "next-gen")

Always:
- import colors, type sizes and spacing from tokens.ts
- enter with ease-out (cubic-bezier(0.16, 1, 0.3, 1)); exits faster than entrances
- stagger related elements 3-6 frames; stagger nothing unrelated
- hold the resolved final frame for at least 1 second
- keep text inside the safe area at the output resolution
Bans work better than descriptions. “No neon glow” removes a default. “Make it premium” leaves the default in place and asks the model to guess what you meant.
4.Write a Brief With Exclusions
A production brief separates what Claude must preserve from where it may explore. Lock the format, the audience, one message and one visual idea, then list exclusions. Ask for a plan before any code.
This is the brief used for the demo:
Deliverable: 1080×1080, 30 fps, exactly 300 frames, built in Remotion as editable React components.
Audience: product designers and founders.
Message: a rough idea only becomes a shippable interface once you add a system and commit to one direction.
Visual idea: one rounded rectangle is the hero. It starts as a hand-drawn sketch, splits into four competing variants, snaps to a grid, merges into a single “Ship it” button, and expands into a finished checklist panel.
Look: warm off-white paper, near-black ink, one violet accent, Inter for UI text, Playfair Display italic for the closing line, flat fills, 3px ink outlines.
Motion: restrained and physical, ease-out entrances, one dominant action per beat.
Avoid: gradients, glass, glow, particles, 3D tilt, bouncing, linear easing, marketing copy.
Before coding, return:
1. a beat sheet with exact frame ranges and the purpose of each beat;
2. the continuity device that links adjacent beats;
3. design tokens;
4. the three riskiest implementation assumptions.
Do not write code yet.
The recurring shape is the most important line in the brief. It gives the viewer something to track across every cut, and it gives Claude a concrete constraint for every transition. Without it, each beat becomes a separate slide.
5.Lock Design Tokens
Motion pieces feel coherent when every shot belongs to one visual world. Named tokens are how you enforce that. These are the demo’s tokens:
Ts
export const TOKENS = {
  paper: '#F2EFEC',
  card: '#FFFFFF',
  ink: '#17131C',
  violet: '#7C3AED',
  muted: '#6D6475',
  rule: '#D8D1CB',
  sans: 'Inter, Helvetica, Arial, sans-serif',
  serif: '"Playfair Display", Georgia, serif',
  safe: 96,
} as const;
Tell Claude to reject literal color, font and spacing values inside scene components. That makes global changes cheap. The grayscale passes in the next steps are the same component with a second token set swapped in, so the entire film changes palette with one prop.
6.Plan Beats in Frames
Remotion treats video as a function of the current frame, so vague durations such as “hold briefly” should become frame ranges. This is the demo’s final beat sheet:
| Beat | Frames | Purpose | Dominant action |
|---|---|---|---|
| Rough idea | 0–44 | Establish the raw starting point | Hand-drawn outline draws itself on |
| Too many directions | 45–99 | Show indecision | Shape splits into four tilted variants |
| Add a system | 100–159 | Introduce rules | Grid appears first, then variants snap to it |
| Commit to one | 160–219 | Show the decision | Variants merge into a “Ship it” button, which gets pressed |
| Ship the interface | 220–267 | Show the result | Button expands into a checklist panel; rows assemble |
| Resolve | 268–299 | Let the viewer read it | Closing line lands; everything holds |
Two rules make this table useful. Each beat has exactly one dominant action. And the grid in beat three appears before the cards move, because the rule has to exist before anything can obey it. A beat sheet that does not read clearly as text will not be rescued by animation.
7.Build in Four Passes
Asking for final polish in one shot is where most slop comes from: color, glow and motion hide the fact that the composition does not work. Build in passes instead, and review each one before starting the next. The demo component takes a pass prop so every pass renders from the same code:
const EASE = Easing.bezier(0.16, 1, 0.3, 1);

const progress = (frame: number, start: number, pass: Pass, dur = 22) => {
  if (pass < 3) return frame >= start ? 1 : 0;
  return interpolate(frame, [start, start + dur], [0, 1], {
    easing: EASE,
    extrapolateLeft: 'clamp',
    extrapolateRight: 'clamp',
  });
};
In passes one and two, every change is a hard cut at the start of its beat. From pass three on, the same keyframes are joined by an ease-out curve. Nothing else about the timing changes.
7.1Pass 1: Block the composition in grayscale
Boxes, gray bars for text and alignment guides. No color, no easing, no real copy. The frame counter in the corner makes it easy to refer to exact moments in feedback.
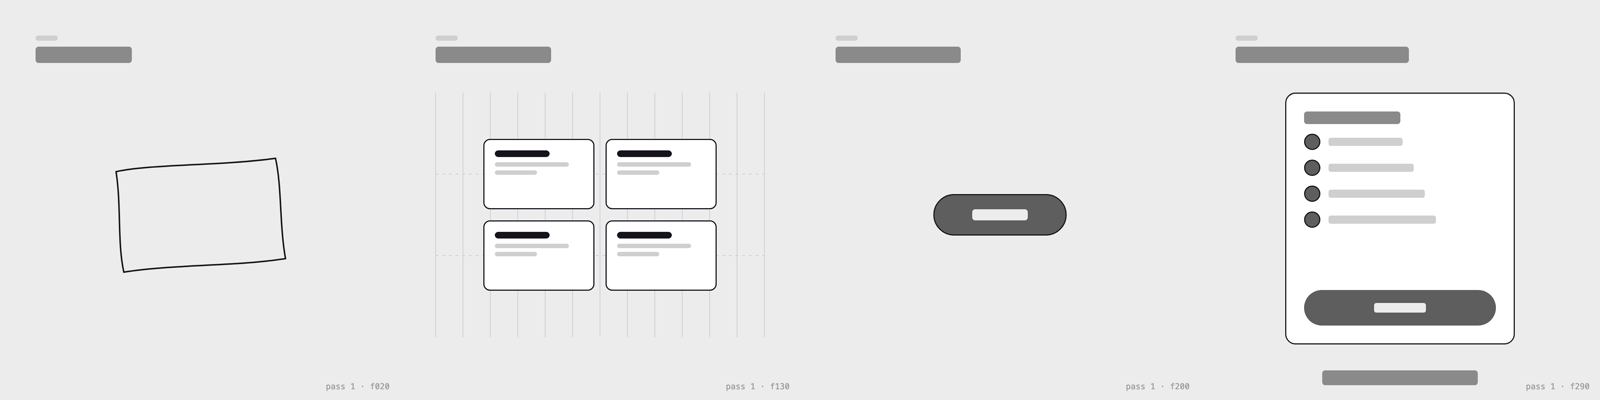
Check scale, balance, safe areas and whether the dominant action of each beat is obvious without color. If you cannot tell what matters in grayscale, color will not fix it.
7.2Pass 2: Lock typography and reading time
Replace the gray bars with final copy at the output size. Check line breaks, reading time and hierarchy. Let a short headline arrive as one unit. Stagger words only when their order carries meaning, not because the code makes it easy.
The demo keeps type to three levels: a small numbered label, a 56px beat title and the closing serif line. Anything more at this size starts to compete.
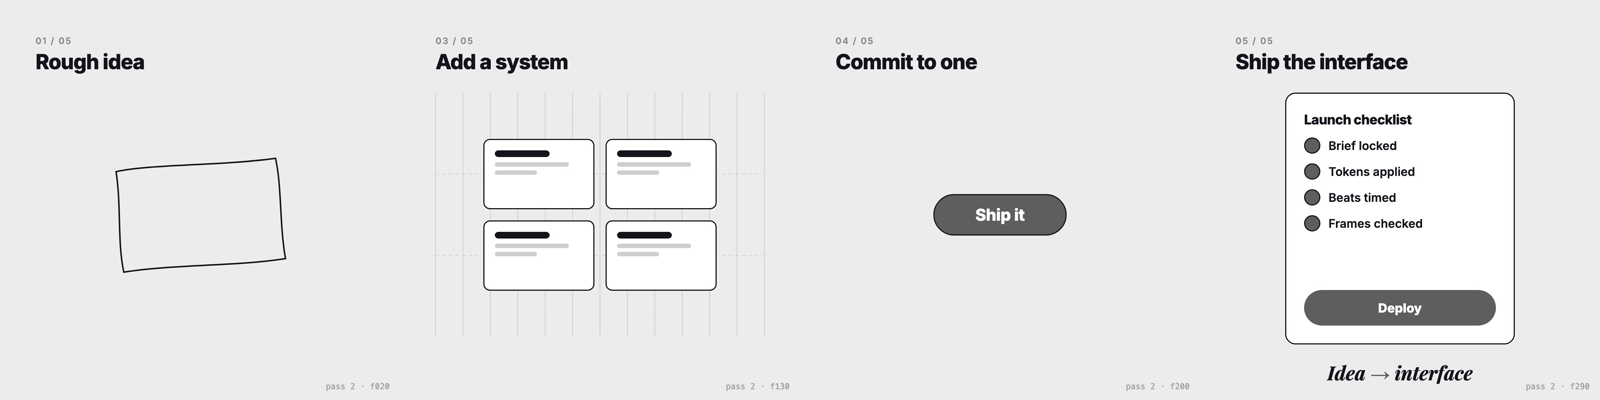
7.3Pass 3: Add motion and continuity
Now connect the keyframes. Animate the hero shape first, then let secondary elements respond to it: the four variants stagger by four frames so the split reads as one gesture, and the checklist rows enter six frames apart. The button press is a 7% scale dip over ten frames, just enough to register as a click.
The difference between pass 2 and pass 3 is the difference between a slideshow and motion design. The layout is identical. Only the transitions changed.
7.4Pass 4: Add color, texture and sound last
Color should reinforce a hierarchy that already exists. In the demo, violet appears only where the decision happens: the button, the completed checks and the arrow in the closing line. A 7% film-grain overlay takes the digital flatness off the paper background without adding a visual idea of its own.
Add music and sound effects after picture lock, cut to visible events. If sound goes in earlier, it hides timing problems you would otherwise see.
8.Render and Inspect Frames
Do not watch the full render first. Render stills at the frames where beats hand off, because that is where most defects live: duplicate elements, one-frame flashes, background mismatches and velocity jumps.
Install
npx remotion still src/index.ts OpusGuidePass4 out/f044.png --frame=44
npx remotion still src/index.ts OpusGuidePass4 out/f100.png --frame=100
npx remotion still src/index.ts OpusGuidePass4 out/f160.png --frame=160
npx remotion render src/index.ts OpusGuidePass4 out/final.mp4 --concurrency=1
Put the stills in a contact sheet and review them side by side.
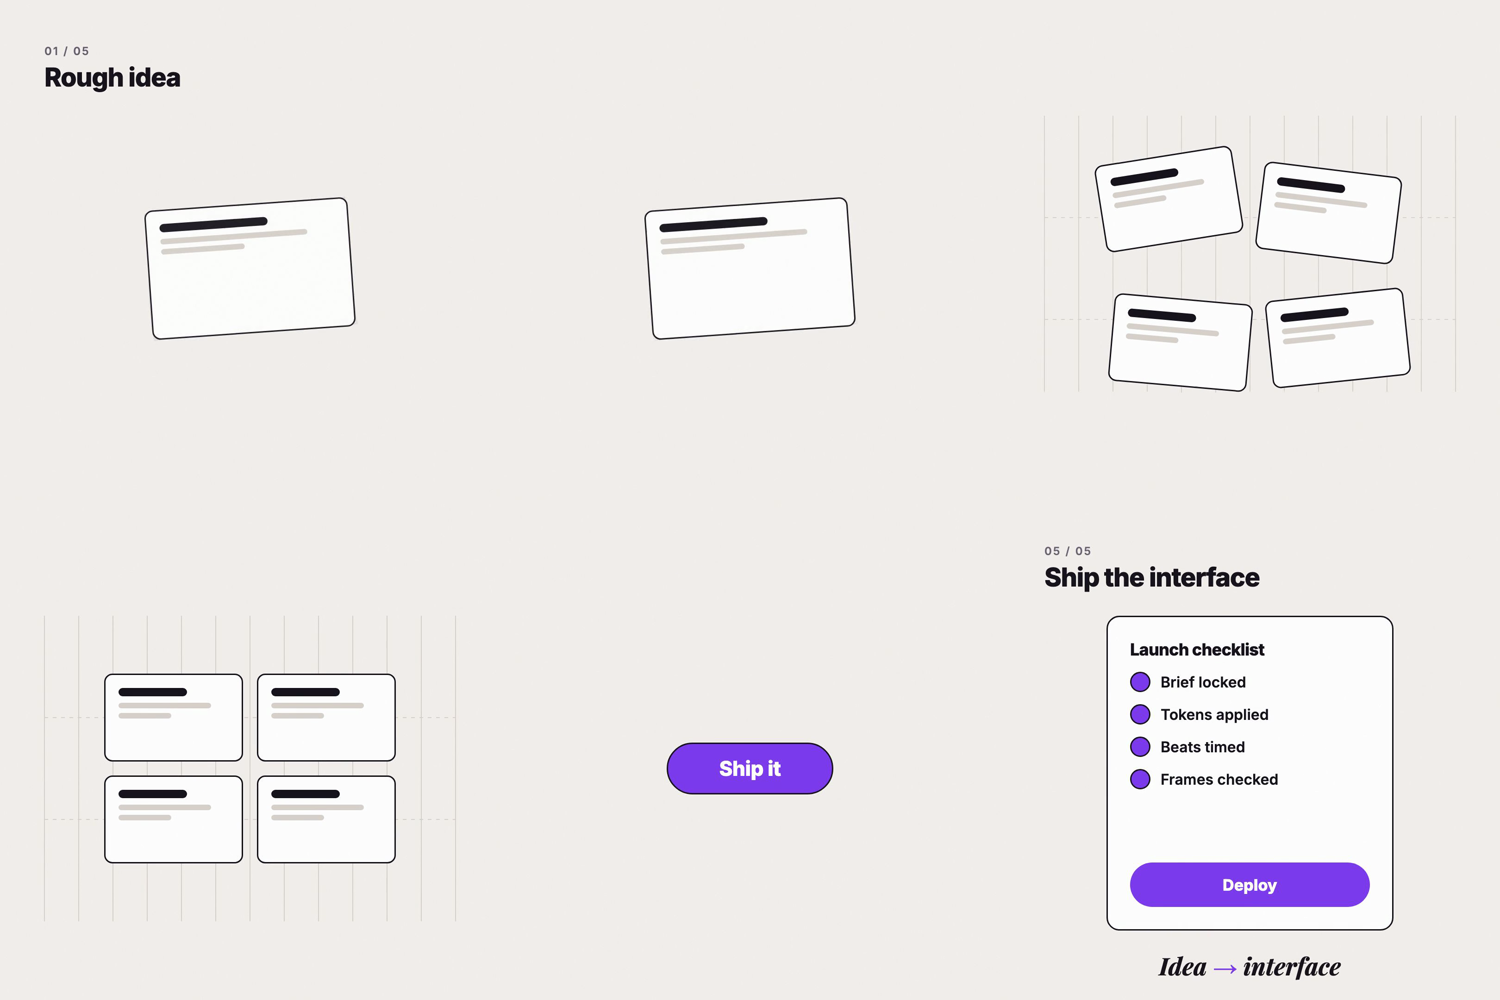
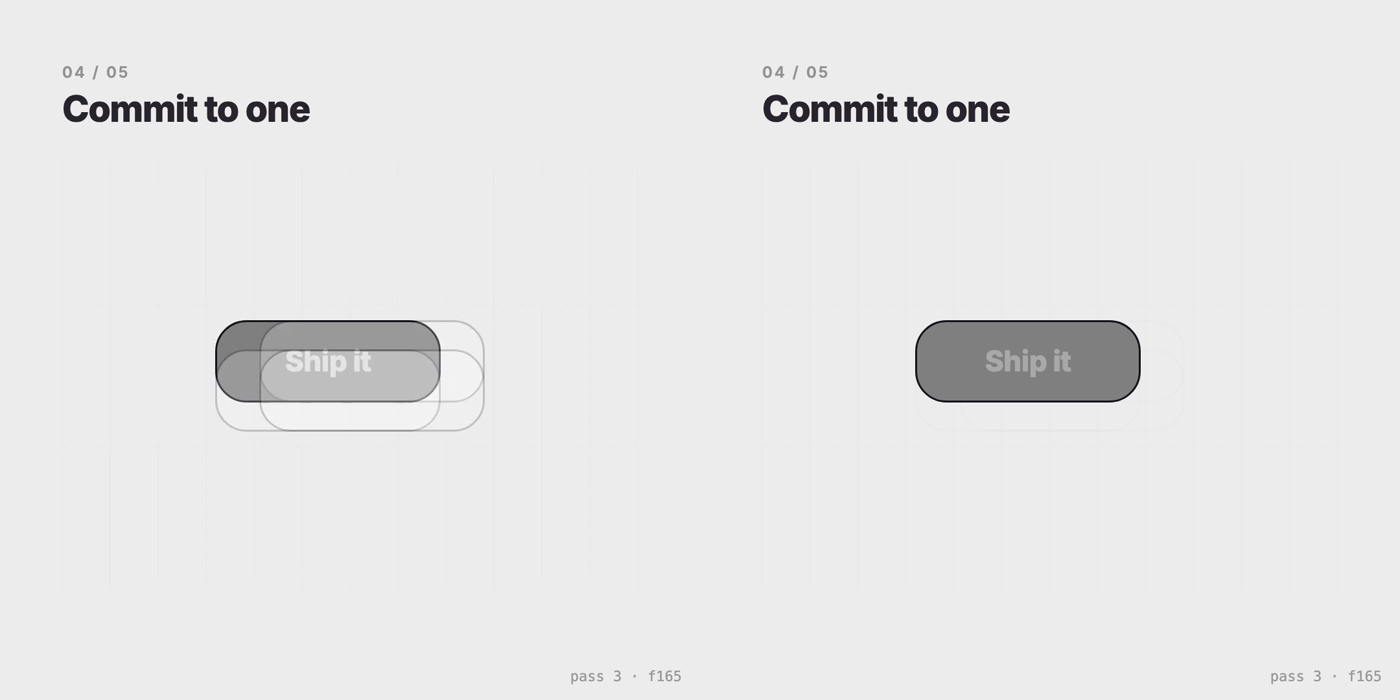
This check caught a real defect in the demo. At frame 165, where the four variants merge into the button, the first pass-3 render showed three translucent ghost cards on top of a half-formed “Ship it” label. Nothing was wrong with the timing; the hero shape was simply drawn first, so the fading variants sat above it. The fix was two lines: draw the hero last, fade the other variants out over 8 frames instead of 22, and hold the button label until the shape is 70% formed. Full playback at 30 fps hides this kind of problem. A still at the exact frame exposes it immediately. Then watch the MP4 once without pausing and write only perception-level notes, such as “the grid arrives after the cards start moving” or “the final hold feels clipped.” Do not prescribe code until the communication problem is clear.
Make Claude do this checking too. Opus 5.5 can read its own renders, so end every build prompt with a verification requirement:
Report any clipped text, overlapping elements, off-token colors, or elements outside the 96px safe area.
Fix what you find, re-render the stills, then render the final MP4 with –concurrency=1 and report the output path.
9.Direct Revisions by Frame
Feedback tied to frame ranges turns taste into testable work. A revision note in this format looks like this, and the values match the final demo:
– Frames 94-112: the grid must finish drawing before the cards begin to snap. Start the grid at 94 and the snap at 100.
– Frames 45-70: the four variants split simultaneously and read as a jump cut. Stagger them 4 frames apart in reading order.
– Frames 196-212: add a subtle press on the Ship it button, scale 1 -> 0.93 -> 1, ease-out.
– Frames 268-299: all meaningful motion must end by frame 286 so the final frame holds for at least 13 frames.
Re-render the stills at 100, 160, 200 and 299 and list the files you changed.
Claude can trace each note to one component and leave everything else alone. “Make it pop” gives it nothing to trace.
10.Examples Worth Studying
Before writing your own brief, look at what other people have made and how. The community-maintained awesome-opus-5-5-videos list collects source-linked Opus 5.5 videos and classifies them by production path: code-drawn 2D, Manim explainers, WebGL scenes, app captures and pipelines that hand off to external video models. It also documents a 53-palette color study and several reusable open-source starter systems.
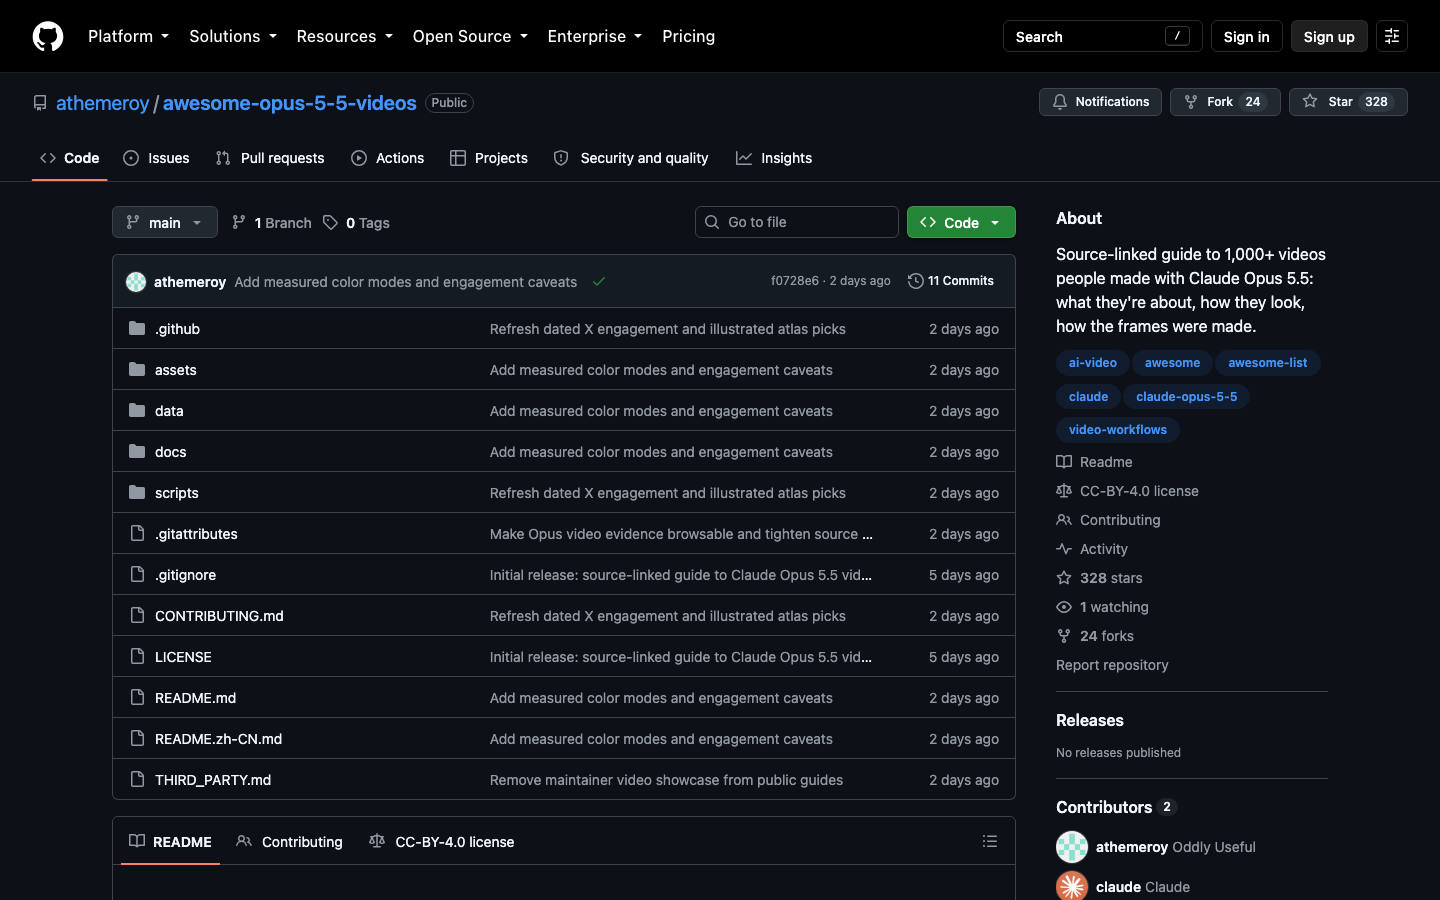
Use it to find a reference whose production path matches what you want to make, then describe that path in your brief. “Code-drawn 2D, flat fills, one recurring shape” gets you much closer than “make it look like this video.”
11.Cost and Limits
Rendering is local and free. The model cost depends on how much Claude reads and writes. One published breakdown of an automated launch-video pipeline measured about 90,000 input and 15,000 output tokens per film, which works out to well under a dollar per video at standard Opus 5.5 pricing, before rendering, voice, assets and retries. Iterative work with several revision rounds costs more, but still less than one hour of a freelance motion designer’s time.
The limits are more important than the cost:
- It can drift toward animated slides. Without a continuity device and camera intent, scenes read as a presentation rather than footage.
- Long runs can reintroduce timers. Check that no
setTimeout, CSS transition orrequestAnimationFramecreeps into later edits. - Facts are not verified by default. Supply the copy and numbers yourself and require Claude to check every on-screen claim against the brief.
- Organic illustration is hard. Charts, type, UI and geometric shapes work well. Hand-drawn characters and complex illustration are better made elsewhere and imported as assets.
Taste stays your job: the brief, the references, the hierarchy, the final copy, licensing and the decision to stop. The advantage of working this way is that the result is an editable system, not a locked clip. A palette change is one token edit, a pacing note is one frame range, and the next render reproduces everything else exactly.


